Posts

Block signal diorama base
Image
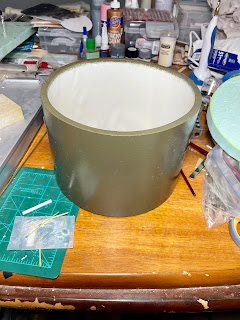
Now I'm going to build the diorama base. I started with a 6" length piece of 8" PVC pipe left over from our pool installation to build the base for the Pueblo line block signals. I used two coats of Kilz to prime the outside of the pipe and then painted the top and sides a CTC machine green color using a custom mix oil-based paint. The green will complement the scenery colors. I noticed little hairs came off the roller I used to paint the green. I need to experiment on how to remove them which may require another coat of green. The scenery base is a piece of 1" foam board insulation as seen below. I measured, marked, and then used an electric jigsaw to make short work cutting out the base. It fits perfectly in the tube.    In this image I'm test fitting the foam, checking what level looks like and then trying to decide how much I want the foam to stick up above - or not the side of the PVC pipe. I want the foam to stick above the pipe to allow for scenery contour...

Signals nearly complete

Image
 I've painted the signals and attached the concrete bases.They are set up for photos to see what I need to address. I need to touch up the black on the target faces, but I think the signals turned out good. They still need a mile marker number decal. It was a fun build and I look forward to trying my hand at additional Showcase Miniatures signals.   

Pink primer sprayed

Image
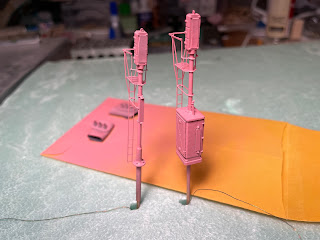
 This evening I washed the signals with mild soap and water and let them dry. I them sprayed them with Tamiya Fine Surface Primer for plastic and metal. Sorry about the pink color, it's what I had. I think it looks pretty good, but I'm going to inspect it after letting it dry for 24-hours and if it needs another coat of primer I'll spray it again. If not, depending on the outside temperature, I'll spray them with Tamiya XF-16 Flat Aluminum. Below is an image of the concrete bases. 
Image
 Today it was warm enough to spray paint the concrete bases concrete colors. I followed Lance Mindheim's technique of spraying first with gray primer and then spraying a quick spray of Rustoleum 'sandstone' textured paint. I'll let the bases dry thoroughly and then an India ink alcohol weathering on them. I'd like to try Pan Pastels to weather the block signals as I have it, but haven't used it before. Next I used CA to glue the signal cabinet base and the cast iron base to the bottom of the signals. I'll let them dry and with the weather being warmer tomorrow, will break out the airbrush and prime/paint the signals. Getting closer to being finished. 
Image
 I've been working on the concrete signal cabinet base. The Showcase Miniatures cabinet has a metal extension below the base plate that I could either try to cut off (no) or build in to the concrete base which is the option I decided to go with. I first rounded a corner on a piece of .010 x .060 Evergreen Scale Model styrene strip. Then I cut and built a box around the signal cabinet base to hide the extension with the rounded corner to the outer top to replicate the angle on the prototype concrete.    The base is rounded so I used styrene rod to fill in the corners and then cut the overhang off.         Below is the cabinet in the base. I have yet to sand it to shape.   This is the base sanded and shaped to the final contour of the concrete base. It's just slightly oversized. I could sand more, but risk the metal base of the cabinet bulging the styrene out when I put everything together.    The image below shows the concrete base pieces...

Second signal with GRS cabinet construction

Image
 Now it's time to build the signal with the GRS signal cabinet. I built the signal head, cage, ladder, and pipe like I did before, but the signal number is located on the cabinet so I left it off. This signal went faster because of trial and error on the previous signal. Signal head attached to the mast. I added a Detail Associates eye bolt to the top of the mast to replicate the bolt. I believe this was used to add/remove the heads of the signals after the mast was in position.    The completed signal minus the cabinet and base. Next is the cabinet which requires several modifications/additions. Prototype images.  I used Precision Scale Co, Inc piping to replicate the pipe on top of the cabinet. I used the supplied number board piece from Showcase Miniatures. I modified it by adding little bits of styrene and Tichy train Group 2" nut bolt washer to replicate the mounting bolt and piece.    The Showcase Miniatures GRS signal cabinet has a thick metal base o...

Signal contstruction starts

Image
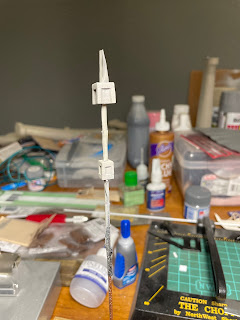
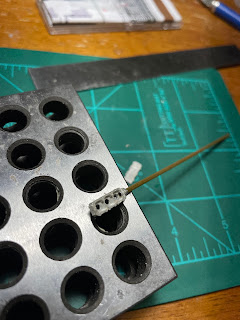
 Now we'll build the signal.  Here are the model parts from Showcase Miniatures (images from their website). You'll notice right away the Mopac signals were mounted on top of the pole and not on an arm like what's shown on the website. I had to come up with a way to modify the parts to match the prototype. First I drilled out the signal head base so it would mount on top of the pole. I attached it with CA glue.   I added the LED lights and secured them with judicious amount of tacky glue. I also used tacky glue to attach the back of the signal. This is in case I have to replace or work on the electronics.  Side view of the signal. Front view of the signal showing the LEDs. I adjusted the LEDs trying to center them the best I could. I then followed the instructions and added the supports and platforms I needed. You can see the signal number board has been added.  The next modification was the ladder. To match the prototype I had to use scrap etched metal fr...