Posts

Cricut Maker

Image
 We got a Cricut Maker. My spouse will use it for crafts and T-shirts and I plan to use it to cut styrene to make buildings, scenery details, and possibly freight cars. There are a few that I doubt will ever be produced in RTR or kit form so this will be the method I use to ensure accuracy/consistency for cutting. I joined a Facebook group that specializes in adapting the Cricut for modeling purposes.

Scenery Supplies

Image
 One of the challenging things with moving every few years is all of my modeling supplies stay in boxes. I forgot what I have and then I'll buy duplicates of the same supplies. This can be helpful at scenery time as scenery, specifically static grass will be something I'll use a ton of and having too much is not an issue. The good thing is one point in the past I collected, sifted, and sorted all of the rock, dirt/soil, etc. that I thought I'd need so I'm ready to use it on the diorama.   I used Joe Fugate's method of building a static grass applicator which you can see the Sour Cream container in the top box. IIRC, it's a little shocking. There are several other items I've used in the past and don't recall specifically how or for what and it's great the internet exists as all I have to do is enter the name of the item and scenery and it'll tell me how to apply/use it. I try to add methods to this blog or I write steps in digital files so I can r...

Line Poles

Image
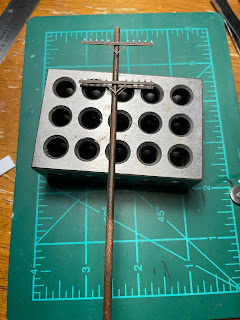
 I started work on the line pole that will feed the block signals. I couldn't remember what the prototype line poles looked like exactly so I looked a few period images to give a rough estimate. This is what I built. Unfortunately I guessed wrong at the insulator colors and luckily I needed to go back and take a few measurements and photos of the prototype, I was able to then try again and make a line pole that is a close representation of the prototype. Prototype images. The Actual line pole that fed the block signal I am building. Not much left of it.  So I traveled to a different signal and used it as an example for my model. This is a line pole next to the line pole that fed the block signal I'm building. You can see the glass insulators on the top arm and then the brown and white ones on the second cross arm. The bottom of the metal brace on the cross arm is only 12 feet off the ground. I used Tamiya Park Green spray paint for the glass insulators and then used Polly Scal...

Weathering track and the line poles

Image
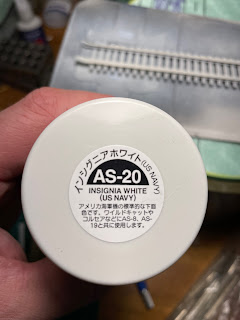
 Next up is the weathering and detailing of the track and the line poles. Because this is a small diorama, I want to try to be as realistic as I can with these details and used Lance Mindheim's track weathering technique. Starting with Micro Engineer code 70 track and Rix Products Railroad Telephone Poles and Cross arms, I first sprayed everything with Tamiya Insignia White (US Navy) spray paint. This provides a base for the weathering. I masked the top of the rails with masking tape. I then used Lance's technique of washes of Burnt Umber oil paint thinned with mineral spirits. Lance says to get the mix the consistency of tea. Initial coat. I decided to go heavier with my burnt umber to model newer ties and line poles. I ended up with four coats of the wash to get to my liking. I then highlighted random ties with Polly Scale Oily Black paint to give the them a new creosote look. I still have to add the insulated joint bars and paint the rail. I did the same with the line pole t...

Modeling Resources

Image
Some of the modeling scenery resources I use are listed below. I'm always up for a new scenery book. I feel Gordon Gravett's Modeling series books are an excellent resource and everyone should have them. I reference Lance's book regularly due to the various techniques he uses. Lou Sassi's scenery books published by Kalmbach Media are nice also. I recently picked up Kathy Millatt's "Building Realistic Model Railroad Scenery" published by Kalmbach Media and I look forward to seeing what techniques she uses. A sometimes overlooked resource are military model builders who seem to be light years ahead of Model Train builders for realistic weathering. A book I've picked up is "Tigers modelling the Ryefield Family" published by Ammo of Mig Jiménez S.L.

Block signal diorama base

Image
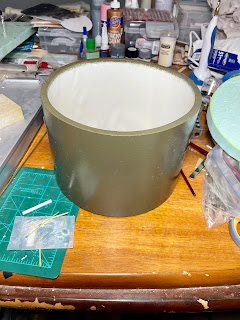
Now I'm going to build the diorama base. I started with a 6" length piece of 8" PVC pipe left over from our pool installation to build the base for the Pueblo line block signals. I used two coats of Kilz to prime the outside of the pipe and then painted the top and sides a CTC machine green color using a custom mix oil-based paint. The green will complement the scenery colors. I noticed little hairs came off the roller I used to paint the green. I need to experiment on how to remove them which may require another coat of green. The scenery base is a piece of 1" foam board insulation as seen below. I measured, marked, and then used an electric jigsaw to make short work cutting out the base. It fits perfectly in the tube.    In this image I'm test fitting the foam, checking what level looks like and then trying to decide how much I want the foam to stick up above - or not the side of the PVC pipe. I want the foam to stick above the pipe to allow for scenery contour...

Signals nearly complete

Image
 I've painted the signals and attached the concrete bases.They are set up for photos to see what I need to address. I need to touch up the black on the target faces, but I think the signals turned out good. They still need a mile marker number decal. It was a fun build and I look forward to trying my hand at additional Showcase Miniatures signals.